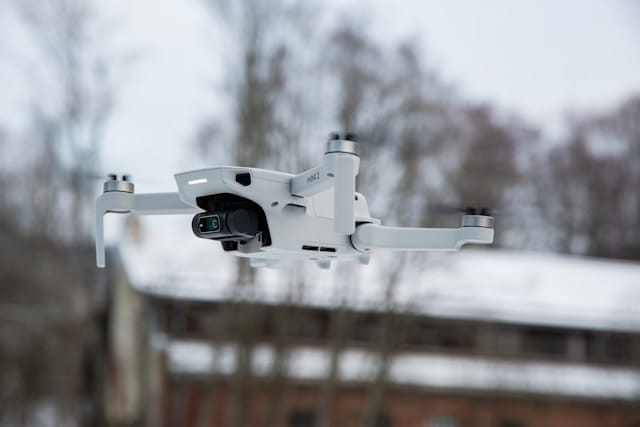
What is a drone pre-flight checklist? A drone pre-flight checklist is a structured sequence of verification steps a pilot completes before every flight, covering mission planning, airspace and weather checks, equipment inspection, on-site setup, and final pre-launch verification. The checklist exists because roughly 60% of drone incidents trace to equipment failures and another 30% to human oversight, and almost every one of them is catchable in the minutes before takeoff.
Refreshed April 16, 2026 to reflect Remote ID verification requirements, Part 108 BVLOS preparation steps, and updated scenario-specific checklist variations for commercial operations.
Table of contents
- Why pre-flight checklists exist (the numbers)
- The five phases of a pre-flight workflow
- Phase 1: Mission planning and paperwork
- Phase 2: Equipment inspection
- Phase 3: On-site setup and calibration
- Phase 4: Final pre-launch verification
- Phase 5: Post-flight and documentation
- Scenario-specific checklist variations
- The economics of skipping a pre-flight check
- Where pilots actually skip (and why)
- The pre-flight maturity model
- Frequently asked questions
- Ready to make every pre-flight bulletproof?
Why pre-flight checklists exist (the numbers)
Every commercial pilot knows the rhythm. The client is waiting, the light is good, the battery is charged, and the temptation is to skip the bit that feels redundant. The data says do not. Industry analyses of commercial drone incidents consistently attribute roughly 60% of failures to equipment issues and 30% to human error, and the FAA's own accident summaries show that the majority of reportable incidents involve something that could have been caught on the ground.
A drone pre-flight checklist is not bureaucracy. It is a structured shortcut through the specific categories of failure that ground missions or worse. The Part 107 regulations, specifically 14 CFR 107.49, require a preflight inspection by the Remote Pilot in Command, but the regulation only says it must happen, not how. The "how" is what separates operators who complete flights cleanly from operators who file incident reports.
The cost of skipping is rarely catastrophic. It is almost always small, repeated, and cumulative: a rescheduled flight, a replaced propeller, a delayed deliverable, a client who stops calling back. Ten of those cost more than one pre-flight checklist ever did.
The five phases of a pre-flight workflow
A real pre-flight is not one event. It is five distinct phases, each serving a different purpose. Collapsing them into one generic pass is what makes checklists fail. The five phases, in order:
| Phase | When | Typical duration | Primary goal |
|---|---|---|---|
| 1. Mission planning | 24–48 hours before flight | 15–45 minutes | Confirm legality, weather, and airspace |
| 2. Equipment inspection | Before leaving base | 10–15 minutes | Verify airworthiness of every component |
| 3. On-site setup | After arrival | 10–20 minutes | Calibrate and verify real-world conditions |
| 4. Pre-launch verification | Immediately before takeoff | 2–5 minutes | Final safety gate |
| 5. Post-flight | After landing | 10–15 minutes | Inspect, log, and document |
The total investment runs 45–100 minutes per flight day, not per flight. Subsequent flights on the same site collapse to Phase 4 plus weather re-checks. The ratio of pre-flight time to flight time is generous at first and drops fast once the site and team stabilize.
Phase 1: Mission planning and paperwork
Phase 1 happens the day before. Most checklist failures that produce regulatory findings start here, not in the field. The task list:
Airspace and authorization. Check the mission area against current airspace restrictions, NOTAMs, and Temporary Flight Restrictions. If the flight enters controlled airspace, submit a LAANC request with enough lead time (LAANC usually processes in seconds, but edge cases can take hours). The airspace for drones guide covers how each airspace class affects pre-flight documentation.
Weather forecast. Pull the forecast for the operational window, not just the launch time. Check surface wind, gradient wind (often double the surface reading at 400 feet), visibility, precipitation probability, and temperature. A METAR reading from the NOAA aviation weather service is the minimum standard for serious operations. Weather considerations go deeper on thermal activity and marginal conditions, and platforms with built-in weather integration pull this data directly into the pre-flight view.
Mission objective and flight plan. Define the specific deliverable (orthomosaic, inspection report, cinematic shot list) and build a flight plan that captures it. Use mission planning software or a flight planner rather than flying freehand.
Site survey. Review satellite imagery, note obstacles not visible on maps (temporary cranes, power lines below tree line, livestock), and identify takeoff/landing zones.
Regulatory paperwork. Confirm the pilot-in-command certificate is current. Verify drone registration matches the airframe. Check that any required waivers are in effect for the flight profile. If the operation crosses into BVLOS territory, the BVLOS compliance guide describes the additional documents.
Risk assessment. For any non-standard flight (night, over people, BVLOS, high-population area), complete a risk assessment or SORA document before leaving. Doing it in the field wastes the most expensive minutes of the day.
Insurance verification. Confirm the policy is active and the coverage matches the mission type. Commercial drone insurance often has exclusions for night, BVLOS, or over-people operations that need to be elected specifically.
Phase 2: Equipment inspection
Phase 2 happens in the shop or home base, before the vehicle leaves. Rushing it because you are running late is the single most common root cause of in-field equipment problems.
Airframe inspection. Visually inspect the frame for cracks, loose screws, and structural deformation. Pay special attention to propeller mounting points, motor housings, and the gimbal attachment. Look at the underside and landing gear for stress fractures.
Propellers. Each blade should be free of nicks, chips, and bends. Even small damage causes vibration that propagates through the airframe and reduces flight performance. Replace propellers that have completed their flight-hour interval regardless of appearance.
Batteries. Check voltage, temperature, and physical condition. Swollen, deformed, or damaged batteries should never leave the shop. Cycle counts matter: most flight-grade lithium polymer batteries degrade meaningfully after 150–250 cycles depending on charge profile. A maintenance schedule tracks this automatically rather than leaving it to memory.
Controller. Verify battery level, joystick calibration, antenna condition, and firmware match with the aircraft. Mismatched firmware between controller and drone causes late-onset binding failures that usually manifest at the worst moment.
Payload and sensors. For mapping, thermal, multispectral, or LiDAR payloads, verify calibration status and that the correct filters or lenses are in place. Sensor warm-up time varies (thermal sensors often need 5–10 minutes before stable readings).
Remote ID module. Any drone not equipped with built-in Remote ID needs a functioning external module. Remote ID enforcement is fully active in 2026 and unbroadcast operations are a per-flight violation. The FAA UAS hub lists accepted Remote ID broadcast modules and current enforcement guidance.
SD cards, storage, and accessories. Formatted cards with sufficient capacity. Spare cables, ND filters, sunshades, and any mission-specific items. A missing USB-C cable can end a commercial job as effectively as a missing battery.
Documentation go-bag. Physical or digital copies of pilot certificate, aircraft registration, insurance certificate, and relevant authorizations. If an inspector asks in the field, the right answer is "here" in under 30 seconds.
Phase 3: On-site setup and calibration
Phase 3 starts the moment you arrive. The site rarely matches the map.
Walk the site. Identify unplanned obstacles, changes since your last satellite imagery, and temporary hazards (construction, livestock, crowds, active manned aircraft). Confirm takeoff and landing zones are safe and accessible.
Weather check, again. Conditions change between the morning forecast and the actual flight window. Check wind at your current location, temperature, and visibility. Afternoon thermal activity can double the expected wind in mountainous or desert sites.
Power on in sequence. Controller first, then aircraft, then the tablet or phone running the flight app. Reversing this order is a common cause of binding and connection problems.
GPS acquisition. Wait for a full satellite lock. Most platforms show a minimum count (typically 10–12 satellites for RTK precision work, 6–8 for standard operations). Taking off with a poor lock produces erratic hold behavior and degrades return-to-home accuracy.
Compass calibration. If the app requests calibration, do it in an area free of metal structures, power lines, and large vehicles. A miscalibrated compass causes drift that only manifests after the drone is too far to recover manually.
IMU calibration. Required after long transport, after large temperature changes, and whenever the app prompts. Skipping this causes the aircraft to drift in hover.
Home point and return-to-home altitude. Confirm the home point is set at the actual takeoff location. Set RTH altitude above the highest obstacle on the flight path plus a safety margin (30 meters is a common minimum, more in forested or urban environments).
Geofence and altitude limits. Verify the maximum altitude matches the authorization (400 feet AGL in most US operations, unless waivered). Confirm geofence boundaries do not cut through the planned flight path.
Telemetry and link quality. Check signal strength for the command link and video downlink. Move the controller or adjust antenna orientation if either is marginal.
Phase 4: Final pre-launch verification
Phase 4 is the two-to-five-minute final pass before every single takeoff. Even on a multi-flight day, Phase 4 runs fresh for each launch.
Visual line of sight check. Confirm the pilot in command and any visual observers can maintain VLOS for the planned flight path. If visibility has degraded or the sun angle has changed, re-plan before launch.
Battery voltage and temperature. Confirm the installed battery reads above the minimum safe voltage and is within operating temperature. Cold batteries (below 10 °C) should be warmed before flight; performance drops sharply in the cold.
Propeller secure check. A quick physical tug on each propeller confirms seating. Folding propellers have a habit of feeling locked when they are not.
Flight mode selection. Confirm the flight mode (P-mode, GPS, Sport, mission-specific) matches the intended operation. Sport mode disables many safety systems and is rarely the right starting mode for commercial work.
Hover test. A 3–5 second hover at 1–2 meters verifies control response, video feed, telemetry, and motor symmetry. If anything feels off, land and diagnose before climbing.
Announce and launch. For crewed operations, verbal callouts confirm the pilot in command is launching, the observers are ready, and the area is clear. For solo operations, a final 360-degree visual sweep takes two seconds and catches the bystander who appeared while you were looking at the tablet.
Phase 5: Post-flight and documentation
Phase 5 is not optional. It is where compliance records are actually made.
Power down in reverse. Aircraft first, then controller. This prevents the controller from trying to reconnect to a powered-down drone and triggering alerts.
Hardware inspection. Check for new damage, heated motors, and debris ingress. Motor temperature after a mission tells you about load and efficiency; consistently hot motors indicate either a propeller or aerodynamic issue.
Battery handling. Let batteries cool before recharging or transporting. Store at the manufacturer-recommended voltage if you will not fly again soon (typically 40–60%).
Data transfer and backup. Pull SD card data immediately. On-device storage is the single most common point of data loss. Back up to at least two destinations before clearing the card.
Flight log entry. Log the flight in whatever system tracks your operations: pilot, aircraft, duration, location, authorization reference, incidents. Modern platforms with DJI log processing or flight log automation do this automatically from telemetry.
Incident debrief. Anything unusual that happened (GPS glitches, unexpected wind, bird interactions) goes into the record. Flight data monitoring helps reveal anomalies that were not obvious in the moment.
Pilot hours update. Add the flight duration to the pilot's flight hours record. Commercial pilot progression often depends on logged hours for insurance, Part 108 preparation, and internal qualification tracks.
Scenario-specific checklist variations
The generic pre-flight covers baseline VLOS operations. Specific mission types add requirements, and these are the checks competitors tend to leave out.
Night operations. Add: anti-collision lighting verification visible for at least 3 statute miles, confirmed night currency for the pilot, night-mode camera configuration, and reconfirmed visual landmarks since the sun angle no longer applies. Part 107 allows night operations without a waiver since 2021, but the operator still must document lighting and pilot training.
Over-people operations. Add: aircraft category declaration (Category 1–4) verified against the operational scenario, crash-impact energy calculation documented, and participant/non-participant identification with explicit communication to the flight crew.
BVLOS and extended-range. Add: visual observers positioned and communication-tested along the route, detect-and-avoid system status confirmed, command link redundancy verified, and contingency procedures briefed. Operators preparing for Part 108 should run the BVLOS checklist even on current waiver operations to build the documentation habit. The FAA BVLOS page covers the proposed Part 108 framework in detail. Survey and mapping operators can see an integrated pre-flight workflow across our case studies.
Indoor operations. Add: GPS-denied mode configured, optical flow or visual-inertial odometry verified, space dimensions measured against flight path clearance, and propeller guards installed.
Swarm or multi-aircraft operations. Add: frequency deconfliction verified, synchronized clocks confirmed, swarm-specific firmware versions matched, and per-aircraft role assignments documented.
Public safety and emergency response. Add: incident command integration confirmed, public safety mission briefing documented, and priority communication frequency monitored.
Inspection of energized infrastructure. Add: minimum approach distance verified against manufacturer specs, RF interference survey completed, and grounding procedures confirmed with the asset owner. Most utility inspection failures trace to electromagnetic interference that was not surveyed in advance.
| Scenario | Added time to pre-flight | Primary added risk |
|---|---|---|
| Night operations | +10 minutes | Obstacle perception, lighting failures |
| Over-people | +15 minutes | Impact energy compliance, crowd movement |
| BVLOS | +30–45 minutes | Detect-and-avoid, link failure response |
| Indoor | +10 minutes | GPS denial, propeller strike |
| Swarm | +20 minutes | Frequency interference, synchronization |
| Energized infrastructure | +20 minutes | EMI, minimum approach violation |
The economics of skipping a pre-flight check
Skipping pre-flight is never free. Skipping it is paying on a different line item.
| Skipped check | Common failure mode | Typical cost |
|---|---|---|
| Battery inspection | In-flight power failure | $500–$5,000 aircraft damage + mission delay |
| Compass calibration | Fly-away or erratic hold | $1,500–$10,000 aircraft loss, possible regulatory report |
| NOTAM/TFR check | Airspace violation | $1,000–$5,000 civil penalty + certificate action risk |
| Remote ID verification | Per-flight violation | $1,000–$3,000 per occurrence |
| Firmware compatibility | Late-onset binding failure | Mission scrub, $0–$500 if caught early |
| Weather reassessment | Wind-induced loss of control | Aircraft loss + potential injury |
| Insurance confirmation | Denied claim after incident | Full replacement cost on operator |
The pattern is consistent: pre-flight checks cost minutes, their failures cost hundreds to thousands of dollars. A commercial operator running three flights per week saves an average of two incidents per year with a consistent checklist, which more than pays for the cumulative time invested.
Where pilots actually skip (and why)
This is the section most checklist guides refuse to write. Experienced pilots know exactly where the temptation to skip lives.
The second flight of the day. Phase 1 and Phase 2 feel redundant because nothing has changed. What has changed: temperature, battery voltage, and sometimes the mission (new subject, different altitude). Phase 4 still runs. Skip it and the second flight becomes the one that crashes.
Familiar sites. "I fly here every week" is the phrase that precedes most airspace violations. TFRs appear. NOTAMs change. Construction starts. The check has to happen even when the site feels familiar.
Time pressure from clients. The client is waiting, and the pilot compresses pre-flight to compensate. Almost every operator has done this at least once. The fix is not discipline alone. It is building the timeline estimate to include pre-flight time so the client expectation is correct from the start.
Solo operations. No observer to catch a missed step. The fix is a physical checklist (paper or tablet) that the pilot signs off step by step. Memory fails. Sign-off does not.
Routine equipment. Pilots flying the same aircraft for months develop blind spots. The aircraft that never had a battery issue will be the one where the issue starts. Regular fleet maintenance scheduling catches what habit cannot.
Fatigue. Late-day flights and long travel days compress the pre-flight. Fatigue is a safety-critical variable that Part 107 handles implicitly through the impairment clause. A fatigued pilot should scrub the flight, not shortcut the checklist.
The pre-flight maturity model
Every operator's checklist discipline follows a predictable progression.
Stage 1: Paper checklist. Solo pilots and small teams run through a printed or laminated checklist. Works until volume grows. Failure mode: checklists get skipped during rushed flights because the paper is not in the workflow.
Stage 2: App or digital checklist. Pilots work through a tablet-based checklist with checkbox completion. Photo verification of steps is possible. Works for teams up to about ten pilots. Failure mode: checklists are completed but not linked to the resulting flight logs, so audit reconstruction requires manual effort.
Stage 3: Integrated platform. The pre-flight checklist sits inside the same system as flight planning, risk assessment, flight log capture, and maintenance records. Every completed checklist is automatically linked to the pilot, aircraft, authorization, and flight log. Audits resolve in minutes. This is where fleet-scale operations have to land to stay compliant at volume.
The progression matters because Stage 1 and Stage 2 both produce checklists. The difference is whether those checklists are findable two years later when an inspector asks. The compliance maturity model covers the broader version of this across the full operational stack.
Frequently asked questions
Is a drone pre-flight checklist legally required?
Yes. FAA Part 107.49 requires the Remote Pilot in Command to complete a preflight inspection before every flight, including checking the aircraft, control links, battery, and operational environment. Part 107 does not prescribe a specific checklist format, but the obligation to perform the inspection is mandatory and enforceable. EASA Specific category authorizations typically require documented checklists as part of the operational manual.
How long should a drone pre-flight checklist take?
Plan for 30–45 minutes the first time you fly a new site or mission profile, and 5–10 minutes for subsequent flights at the same site. The time is not the cost of the checklist, it is the cost of not filling the gaps. Operators who consistently run 2-minute pre-flights are usually missing one of the five phases.
Does the same checklist work for every drone?
No. The checklist structure is similar but specific steps differ by manufacturer and model. DJI aircraft, Autel platforms, Parrot, Skydio, and custom builds all have different calibration sequences, payload configurations, and battery procedures. Airframe-specific checklists are the practical standard; a universal checklist covers the category but misses the manufacturer-specific steps.
What is the most commonly skipped pre-flight check?
Remote ID verification and NOTAM/TFR checks are the two most skipped checks, based on both incident reports and enforcement actions. Remote ID gets skipped because the indicator is often not obvious. NOTAM/TFR checks get skipped because pilots flying familiar sites assume restrictions have not changed. Both failures produce per-flight violations that compound quickly across a busy operator.
Ready to make every pre-flight bulletproof?
Pre-flight discipline is not about memorization, it is about the system. Every check completed, linked to the pilot and aircraft, saved to the flight record, and ready for an audit question two years later. That is what commercial operators need once volume rises above the level a single person can hold in their head.
DroneBundle runs airframe-specific pre-flight checklists inside the same workflow as flight planning, weather integration, and automatic flight log capture. Every check completed feeds directly into the flight record. Every missed check alerts the pilot before launch. Every completed checklist links to the flight it authorized, so audits take minutes instead of weeks.
Start your free trial today, no credit card required.
Or book a live demo to see integrated pre-flight workflows for your fleet.